How can I align print perfectly?
The 1099 software will print Copy B on plain paper with black ink. The user data should line up perfectly with Copy B. If your
data doesn't align perfectly with Copy B, you can adjust the horizontal or vertical offsets to align your data perfectly.
Adjust Offsets
Go to File/Print and print out Copy B to paper. The software has a left, top1 and top2 offsets (and sometimes top3). top1
is the top offset for the 1st form and if only one form is printed per page, then top1 is the only offset you need to adjust.
Below is a screen shot for 1099-MISC:

The default left offset is 0.30 or 30 pixels to the right from the left edge of the form. If you increase this from
0.30 to 0.40 and click Save, then your data is printed 10 pixels farther to the right. One pixel represents one dot. 10
pixels to the right moves your data slightly to the right.
Typically the data prints too high or too low. top1, in this example, is 0.22 (22 pixels) from the top and top2 is 5.79 (579 pixels or
roughly 5.79 inches) from the top. If you want to move your data down, increase the value of top1 from 0.22 to 0.27 and hit Save;
this is a 5 pixel increase. If you want to move your data up, decrease the value of top1 from 0.22 to 0.17 and hit Save. Click
a 5 pixel move up or down usually solves all printing problems. You can try increasing the top1 offset by 0.10 (10 pixels) or by
0.15 (15 pixels) to move the data more.
Align Form 1096
You can adjust the 1096 offsets by clicking on this button:
![]()
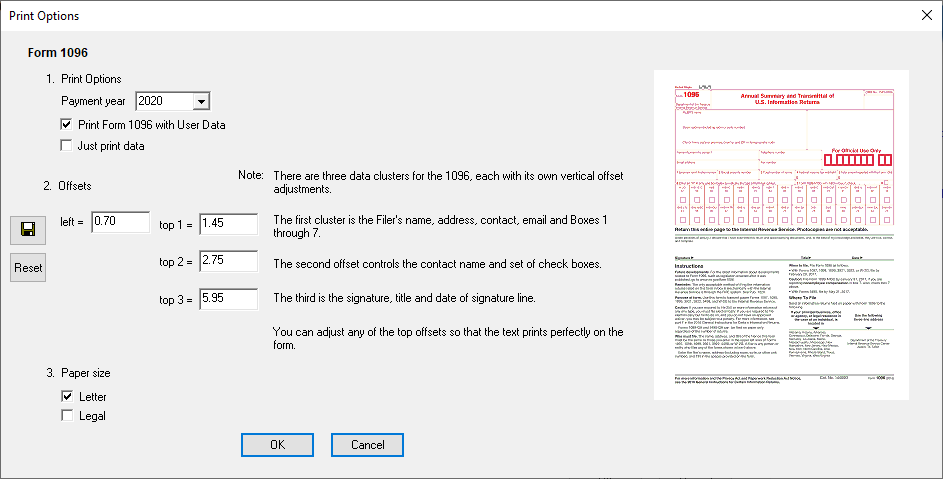
and you will see this Form 1096 print options:

top1 is the offset for the first cluster of data which is the filer's name, address, contract, email and Boxes 1-6. top2
is the top offset for the 1099 check boxes. And top3 is the offset for the signature, title and date of signature.


